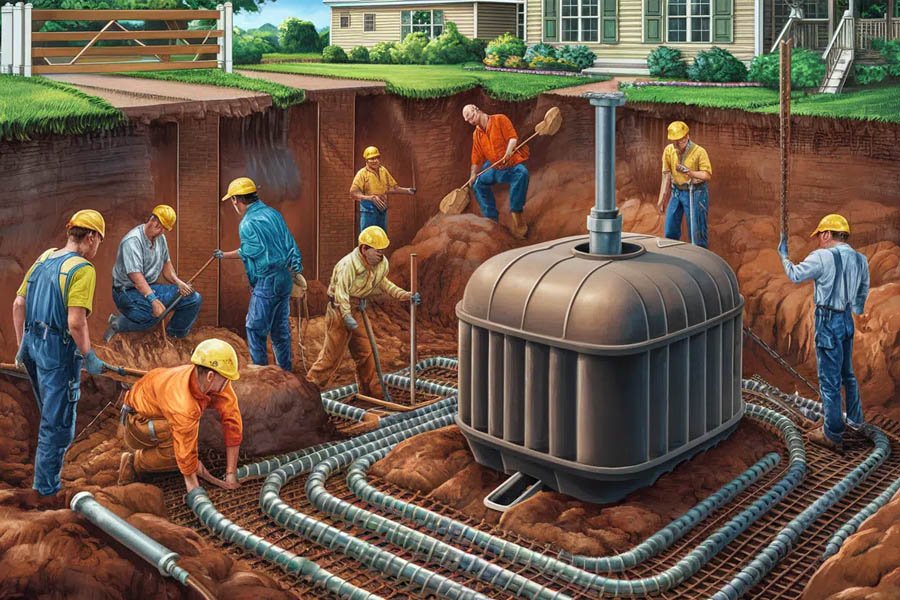
Few home projects carry the sticker shock of septic replacement. Homeowners who get the news that their system is failing often go through a predictable sequence: denial, a frantic search for a second opinion, and finally a resigned question about what actually happens next. The uncertainty is often worse than the price. Most people have no idea what the process looks like, how long it takes, or what will be left of their yard when the crew drives away.
This walkthrough covers the full journey from the first failed inspection to the final grade of topsoil. Every property is a little different, and local regulations vary quite a bit from state to state, but the general sequence is remarkably consistent across most of the country. Knowing what to expect turns a stressful project into a manageable one.
Step 1: Confirm the System Actually Needs Replacing
Before anything else, get a proper diagnosis. A failing drain field can sometimes mimic other problems, like a clogged pipe or a saturated tank that just needs pumping. A licensed inspector or septic contractor will evaluate the tank condition, the baffles, the distribution box, and the drain field, usually with a combination of a visual inspection, dye testing, and in some cases a camera down the lines.
The key distinction is between a repair and a replacement. A cracked lid or a crushed line can often be fixed for a few hundred or a few thousand dollars. A drain field that has become biologically clogged, or a steel tank that has rusted through, is a different story. If a contractor immediately recommends a full replacement without inspecting anything, get a second opinion. Reputable companies will show you what they found and explain why repair is or is not an option.
Step 2: Soil and Site Evaluation
If replacement is confirmed, the next step is a site evaluation, sometimes called a perc test or soil analysis depending on your state. A soil scientist or licensed evaluator digs test pits, examines how quickly water moves through the soil, notes the depth to the water table and bedrock, and identifies any setback constraints like wells, property lines, water bodies, or slopes.
This step determines what kind of system you can legally install. Properties with deep, well-draining soil can often use a conventional gravity system, which is the simplest and cheapest option. Properties with high water tables, heavy clay, or small lots may need an engineered solution such as a mound system, an aerobic treatment unit, or a pressurized drip system. The soil results effectively set the budget range, so this is where the real numbers start to take shape.
Step 3: Design and Permitting
Once the site evaluation is complete, a designer or engineer prepares a system layout that meets your local health department requirements. The design specifies tank size, drain field dimensions, materials, and exact placement on the property.
Then come the permits. Your local health or environmental department reviews the design, and in some jurisdictions the review process takes weeks. Some areas also require a public notice period or additional approvals if the property is near a protected waterway. This is the part of the process homeowners have the least control over, so it pays to file paperwork early and respond quickly to any requests for revisions. A contractor who handles permitting regularly will know the local requirements and can prevent avoidable delays.
Step 4: Choosing the System and Finalizing the Quote
With the design approved, you will confirm the system type and get firm pricing. Quotes should itemize excavation, the tank, distribution components, drain field materials, labor, permits, and site restoration. Ask each bidder what is not included. Landscaping repair, driveway protection, tree removal, and disposal of the old tank are common add-ons that catch homeowners by surprise.
This is also the time to think about the future. If your household might grow, or you plan to add a bedroom, many jurisdictions require the system to be sized for the potential future load. Installing risers on the new tank is a small extra cost that makes future inspections and pumping far easier. A little planning here pays off for decades.
Step 5: Scheduling and Site Prep
Most replacements take two to five days of actual work, but scheduling depends heavily on weather and contractor availability. Wet seasons and frozen ground complicate excavation, which is why late summer and fall are the busiest windows for septic work. Book early if you want a specific time of year.
Before the crew arrives, mark any irrigation lines, invisible pet fencing, and utility runs. Move anything portable out of the work zone, and plan for the fact that heavy trucks will cross parts of your property. If your household depends on the system daily, ask the contractor about the timeline for water use restrictions. Most families can stay in the home during the work, but you may need to limit water for a day or two.
Step 6: Excavation and Tank Installation
Work usually begins with removing or decommissioning the old tank. Regulations vary here. Some jurisdictions require the old tank to be pumped and crushed or removed entirely, while others allow it to be pumped and filled with clean fill material and abandoned in place. Your contractor will handle the required paperwork either way.
Next, the crew excavates for the new tank and sets it on a properly prepared base. Modern tanks are typically precast concrete or fiberglass, and both are far more durable than the steel tanks installed decades ago. The tank is leveled, the inlet and outlet connections are made, and the baffles and effluent filter are installed.
Step 7: Drain Field Installation
With the tank in place, the crew builds the drain field according to the approved design. For a conventional gravity system, this means excavating trenches or a bed, placing perforated pipe on washed stone, and covering everything with geotextile fabric before backfilling. Alternative systems follow their own designs, such as raised sand mounds, drip dispersal tubing, or chambers, but the principle is the same: create an underground area where wastewater can percolate into the soil and receive final treatment.
Grading matters enormously at this stage. The distribution box or manifold must be set level so effluent spreads evenly across the field. A sloppy installation here is a common root cause of premature field failure, which is why the inspection in the next step exists.
Step 8: Inspection and Approval
Before the system gets covered completely, and in many counties before final backfilling, a health department inspector visits to verify the installation matches the permitted design. They check tank setting, pipe slopes, stone depth, and distribution leveling. If anything is off, the contractor corrects it before the inspector returns.
Once the system passes, the final cover and grading are completed, the permit is closed out, and you should receive a copy of the as-built drawing. Keep that document. It shows exactly where everything is buried, which is invaluable for future pumping visits, landscaping decisions, and eventual resale of the home.
Step 9: Restoration and Startup
The last step is restoring the yard. Expect the grass over the tank and field to need reseeding, and know that the soil will settle for several months, so a light topdressing of soil in spring is normal. Follow the contractor’s guidance on when the area can handle foot traffic, and never allow vehicles to park or drive over the drain field, ever.
For the first few weeks, use water moderately while the system establishes itself. If you installed an aerobic treatment unit, there is usually a startup checklist and possibly a maintenance contract requirement, so read the owner’s materials carefully.
A Few Pieces of Honest Advice
First, the cheapest bid is rarely the cheapest project. Installation quality determines whether your new system lasts 40 years or 15, and the difference is usually invisible until it is not. Second, keep every document: permits, design drawings, inspection approvals, and receipts. They matter enormously when you sell the house. Third, put the new system on a maintenance schedule from day one. Regular pumping and a few sensible water habits are the difference between a system you forget about and one you think about every time it rains.
Replacement is a big project, but it is a well-trodden one. Thousands of homeowners go through it every year, and with the right contractor and a clear picture of the process, most come out the other side with a reliable system and a yard that recovers faster than they expected.