Key Takeaways
- Begin with a complete home checkup before committing to a major purchase.
- Address active leaks, electrical warning signs, drafts, and airflow problems early.
- Treat heating, cooling, plumbing, insulation, and electrical capacity as connected systems.
- Use seasonal maintenance to reduce the chance of expensive emergencies.
- Compare safety, comfort, operating costs, maintenance, and expected service life, not just the upfront price.
- Confirm rebate eligibility and equipment requirements before signing an installation contract.
A comfortable, efficient home is rarely the result of one dramatic upgrade. It comes from paying attention to the systems that affect everyday life, including heating and cooling, plumbing, electrical service, insulation, and ventilation. A practical plan helps homeowners make improvements in the right order, rather than waiting for a breakdown to force an expensive decision. Whether the next project is a small repair or a larger renovation, working with experienced Woman-owned home services professionals can help homeowners understand what is urgent, what can be monitored, and what should be planned for later. Good decisions start with clear information about the home as it is today.
Why a Whole-Home Plan Makes Sense
Home systems affect one another. For example, an aging air conditioner may seem like the source of high summer bills, but the real problem could be leaky ductwork, poor attic insulation, blocked returns, or air gaps around windows and doors. Replacing equipment without correcting those issues can leave the home uncomfortable and the new system working harder than necessary. A written plan also makes costs easier to manage. Instead of treating every repair as an isolated event, homeowners can identify safety concerns, schedule preventive work, and set aside money for upgrades that will be needed over the next few years.
Step 1: Create a Home Systems Snapshot
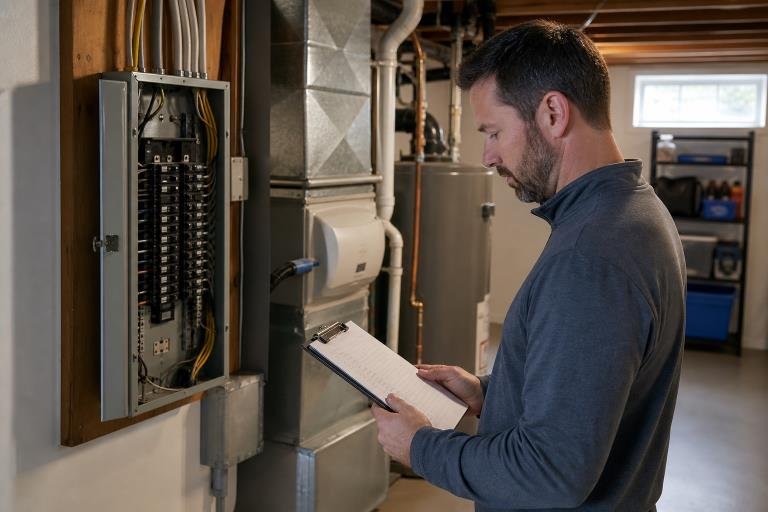
Start by creating a simple record of the home’s major systems. Include the installation year if known, recent repairs, warranties, recurring concerns, and the name of the last company that performed service. Take clear photos of equipment labels, water shutoffs, the electrical panel, and any visible damage. Write down unusual sounds, smells, leaks, temperature changes, breaker trips, or areas that feel damp. These notes can help identify patterns that are easy to forget once a problem has disappeared.
Suggested Checklist
- Heating and cooling equipment, thermostats, vents, and ductwork
- Electrical panel, breakers, outlets, switches, and lighting
- Water heater, main shutoff valve, visible supply lines, drains, and faucets
- Insulation, weather stripping, window and door seals
- Smoke alarms, carbon monoxide alarms, and surge protection
Step 2: Check Comfort and Energy Loss
Many energy problems are visible before they appear on a utility bill. Common clues include rooms that remain too hot or cold, drafts near doors, dusty vents, high indoor humidity, stale air, and equipment that starts and stops repeatedly. Rising bills without a major change in household habits also warrant closer scrutiny. Begin with low-cost steps. Replace filters according to the manufacturer’s instructions, keep supply and return vents open, seal obvious small gaps, and remove leaves or debris from outdoor equipment. The ENERGY STAR home energy savings guide notes that air sealing and insulation can be among the most cost-effective ways to improve comfort and efficiency.
If uneven temperatures, moisture, or poor airflow continue, the cause may be hidden in ducts, walls, insulation, or electrical components. That is the point where a professional assessment can prevent guesswork and unnecessary spending.
Step 3: Plan Heating and Cooling Work
Routine Care
- Replace or clean filters as recommended for the system and household conditions.
- Keep vents and returns unobstructed by furniture, rugs, and storage.
- Clear vegetation and debris away from outdoor units.
- Schedule heating and cooling inspections before periods of heavy seasonal use.
When Replacement May Be Worth Considering
Replacement may make sense when repair costs keep growing, parts are difficult to obtain, comfort remains poor after maintenance, or energy use rises despite normal operation. Proper sizing is essential. An oversized system can have a short cycle, reducing efficiency and leading to uneven humidity control. A qualified contractor should evaluate the home’s layout, insulation, windows, and airflow rather than choosing equipment based solely on square footage.
Step 4: Review Electrical Safety and Capacity
Electrical warning signs should not be treated as routine annoyances. Flickering lights, warm or discolored outlets, buzzing switches, frequently tripped breakers, burning odors, and extension cords used as permanent wiring all deserve prompt attention. Avoid do-it-yourself repairs inside a panel or behind walls. Older homes may also need a capacity review before adding an electric vehicle charger, a backup battery, a heat pump, an induction range, or other high-demand equipment. A load review can show whether the existing panel and service can safely support the planned upgrade.
Step 5: Find and Prevent Water Problems
Check under sinks monthly for moisture, cabinet swelling, and corrosion. Test toilets for silent leaks, inspect visible pipes and water heater connections, and make sure household members know the location of the main water shutoff. Slow drains, reduced pressure, repeated clogs, or water sounds inside walls can indicate a developing issue. Small leaks can damage flooring, drywall, cabinets, and nearby electrical components over time. Fixing a drip early is usually simpler than repairing the material damage that follows it.
Step 6: Build a Seasonal Maintenance Calendar
Spring and Summer
- Inspect cooling equipment, drainage, hose connections, and exterior fixtures.
- Watch indoor humidity, uneven temperatures, and unusual electrical activity during heavy cooling use.
- Keep outdoor cooling equipment clear and check for winter damage around exposed systems.
Fall and Winter
- Test heating equipment before the first cold spell.
- Check smoke and carbon monoxide alarms, weather stripping, and visible insulation.
- Protect exposed pipes during freezing weather and keep clearance around heaters and electrical equipment.
Step 7: Set a Smart Upgrade Order
- Safety: Address electrical hazards, gas concerns, carbon monoxide risks, and active leaks.
- Prevention: Complete maintenance that protects existing equipment and prevents avoidable damage.
- Efficiency: Improve sealing, insulation, controls, and airflow before replacing major equipment.
- Planning: Budget for upgrades with long lead times and coordinate related projects.
Review priorities annually as household needs, equipment performance, and future project goals change over time.
Step 8: Document Decisions and Service Visits
Keep a folder or secure digital file for estimates, inspection reports, invoices, manuals, warranty details, and photographs taken before and after work. These records make it easier to compare recommendations, confirm what was installed, and track recurring issues. When requesting service, describe the symptom, when it occurs, and any recent changes to the home, such as remodeling, new appliances, or changes in occupancy. Specific information helps a technician investigate efficiently and reduces the chance that an intermittent problem will be overlooked. Good documentation is especially helpful when equipment is still under warranty or when a home may be sold in the future.
Ask Better Questions Before Approving Work
Before approving a repair or replacement, ask what condition was found, what testing supports the recommendation, and whether there are practical alternatives. Request an explanation of the expected benefit, the likely service life of the proposed option, and the maintenance it will require. For larger projects, confirm permits, scheduling, access requirements, cleanup responsibilities, and who will coordinate work if more than one trade is involved. It is also reasonable to ask how the contractor will protect floors, furnishings, pets, landscaping, and nearby finished surfaces. Clear expectations help avoid misunderstandings and create a more organized project.
Watch for Changes After Improvements
After any major repair or installation, pay attention to how the home performs over the following days and weeks. Check whether temperatures are steadier, whether humidity feels more manageable, and whether the system runs quietly and consistently. Look again for drips, unusual odors, new stains, or changes in water pressure and electrical behavior. Save paperwork and register equipment promptly when registration is required to preserve warranty coverage. If the result does not match what was discussed, contact the service provider early and document the concern with dates, photos, and notes. This follow-up makes it easier to resolve issues before minor adjustments become bigger disruptions.
Know When to Act Quickly
Some home concerns require immediate action rather than a place on the maintenance calendar. Leave the home and contact the appropriate emergency service if you smell gas, see sparks or smoke, discover standing water near electrical equipment, or believe a carbon monoxide alarm may be responding. For less obvious issues, note the circumstances before calling for help. Record the time, weather, equipment settings, and activities taking place when the symptom appears. A clear timeline can distinguish a one-time disruption from a repeatable condition that needs diagnosis.
Coordinate Related Projects
Consider the effect of one project on the next. If walls or ceilings will be opened for plumbing or electrical work, ask whether insulation, air sealing, wiring, or low-voltage connections should be addressed at the same time. If a kitchen renovation is planned, confirm electrical capacity before selecting new appliances. If roofing work is approaching, inspect attic ventilation and insulation first. Coordinating related tasks can reduce duplicate labor, limit damage to finished surfaces, and prevent a new installation from needing to be altered soon afterward. It also makes schedules easier, because access, permits, and inspections can be organized around a single project.
Create a Repair Reserve
Build a realistic reserve for maintenance and repairs, even when everything appears to be working well. The amount will vary by the home’s age, size, condition, and equipment, but a dedicated category can keep urgent needs from competing with ordinary household expenses. Review service invoices once or twice a year to identify patterns, such as repeated drain-clearing, frequent capacitor replacements, or ongoing moisture around a fixture. Those patterns indicate that a repair strategy should shift toward a more durable solution. When gathering estimates, compare the scope of work, materials, warranty terms, exclusions, and assumptions rather than relying only on a bottom-line number.
Prepare for Service Days
Finally, plan for access and daily use while work is underway. Ask where technicians will park, which entrances they will use, whether water or power must be turned off, and how long rooms or equipment may be unavailable. Move fragile belongings, clear paths to panels, shutoffs, attics, and mechanical rooms, and make arrangements for children and pets if noise, dust, or open doors create a concern. After the work is complete, ask for operating instructions, recommended maintenance intervals, and any signs that should prompt a return visit. A short final walkthrough gives homeowners a chance to confirm locations, labels, controls, and cleanup before the crew leaves for good.
Make the Plan Part of Household Routine
A home plan works best when everyone knows the basic routines. Show household members how to shut off water, reset a tripped breaker safely, replace a filter, and recognize signs that require professional help. Keep emergency contact information accessible and review the plan after a renovation, a move, or a change in household needs. Small, consistent actions can protect comfort, reduce surprises, and support better long-term decisions about the home.
Conclusion
Keeping a home comfortable, efficient, and safe requires more than responding to problems as they arise. By evaluating home systems together, addressing maintenance early, and planning upgrades in a logical order, homeowners can reduce unexpected repairs and make better long-term investment decisions. Regular inspections, seasonal maintenance, and informed purchasing decisions help improve performance while protecting the home’s value. Working with experienced professionals and staying proactive allows homeowners to maintain reliable, efficient systems that support everyday comfort for years to come.