Shiplap has become a design staple in many homes, offering a rustic, charming aesthetic that works well in a variety of spaces. Initially popularized by modern farmhouse interiors, this versatile wooden board with its distinct, overlapping edges has found a place in living rooms, kitchens, and even bedrooms. But when it comes to bathrooms, many homeowners hesitate—can shiplap withstand the high humidity and frequent moisture fluctuations typical of these spaces?
The answer is yes, but only when the right materials and installation techniques are used. This article explores why shiplap can work in bathrooms, how to choose the right type for the space, and how to ensure it stays in top condition.
The Challenges of Bathrooms and Moisture
Bathrooms, with their steam-filled showers, tubs, and the occasional lack of ventilation, present unique challenges when it comes to materials. Moisture is the primary concern, and exposure to excess water can lead to issues like warping, peeling, and even mold growth. Wood, being hygroscopic (it absorbs moisture), is particularly vulnerable. As such, installing traditional wood shiplap in a bathroom without proper precautions could result in costly repairs and a shortened lifespan for the material.
However, moisture isn’t the only challenge in a bathroom. High humidity can also lead to the growth of mold and mildew, especially in areas that aren’t well-ventilated. Without proper sealing, these fungi can thrive, damaging surfaces and creating an unhealthy living environment.
Why Shiplap Can Be a Good Option for Bathrooms
Despite the moisture-related concerns, shiplap can indeed work in a bathroom—provided it’s treated correctly. In recent years, the availability of moisture-resistant materials has made it much easier to incorporate shiplap into damp spaces. Modern alternatives such as moisture-resistant MDF (Medium-Density Fiberboard) and PVC have transformed shiplap from a decorative feature to a viable choice for bathrooms.
The key is ensuring the boards are sealed and installed correctly. Moisture-resistant MDF or PVC shiplap won’t warp, swell, or harbor mold the way traditional wood might, making them an ideal choice for high-humidity areas. Additionally, even natural wood shiplap can be used, but it requires careful sealing and painting to prevent water damage. With the right approach, shiplap can not only survive but thrive in your bathroom.
Choosing the Right Shiplap for Bathrooms
When deciding on shiplap for your bathroom, selecting the right material is paramount. While traditional wood shiplap may offer the most authentic look, it demands extra care to ensure longevity. Wood boards should be thoroughly sealed with a moisture-resistant primer and finish to prevent water penetration. In contrast, PVC or vinyl options are waterproof and mimic the natural wood aesthetic without the risk of warping or mildew. These materials require minimal upkeep and are much more suited to environments where moisture levels fluctuate.
MDF shiplap strikes a balance between authenticity and practicality. While it still requires proper sealing, it is less prone to warping compared to real wood. Additionally, MDF comes in a variety of textures and finishes, allowing you to customize the look while maintaining a practical approach.
The finish you choose for your shiplap is equally important. Glossy or semi-gloss finishes are recommended for high-moisture areas because they create a waterproof barrier on the surface. Additionally, the paint should be specifically designed for bathrooms or other high-humidity environments.
Installation and Maintenance Tips
Once you’ve selected the right material and finish, proper installation becomes the next crucial step. Begin by ensuring the bathroom is well-ventilated. A functioning exhaust fan or open windows can reduce humidity, which in turn helps protect the integrity of your shiplap. It’s also a good idea to apply a moisture barrier on the wall surface before installation to reduce the risk of condensation damage.
Before installing the shiplap, paint or stain the boards. Doing this before installation helps ensure even coverage, especially in the gaps between the boards, which are difficult to reach once the boards are on the wall. Use a moisture-resistant primer, followed by at least two coats of high-quality paint or stain, to create a durable, water-repellent surface.
Once the boards are up, pay close attention to the edges. Caulking around the edges and between the boards prevents moisture from seeping behind the material. Finally, a topcoat of water-resistant sealant will add an extra layer of protection.
Maintenance is also crucial. Regularly wipe down the shiplap with a damp cloth to remove dust and moisture buildup. Periodically check for signs of warping or peeling paint, especially around corners and edges. If any damage is detected, addressing it early can prevent more serious issues later.
Aesthetic Flexibility of Shiplap
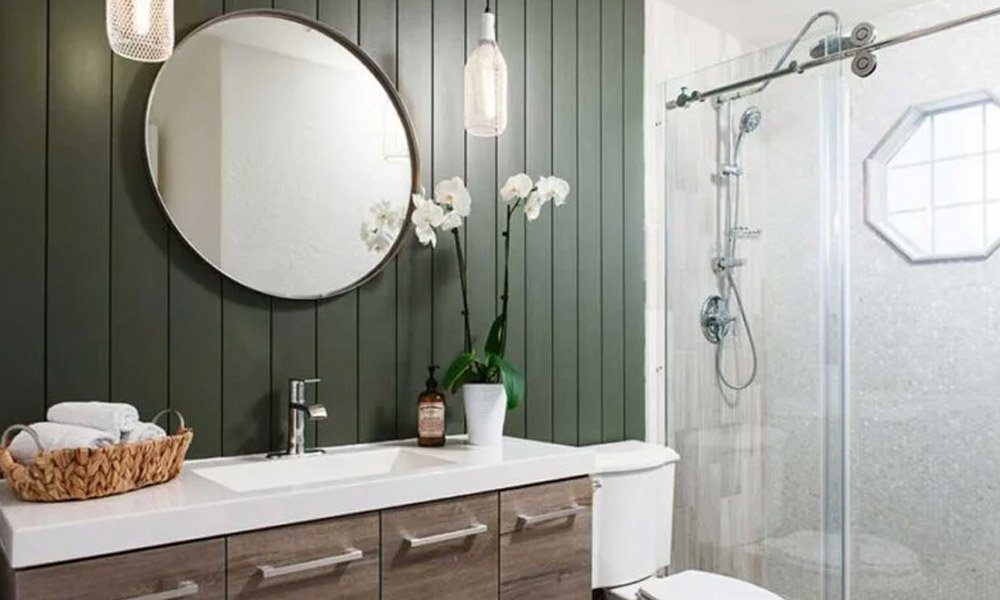
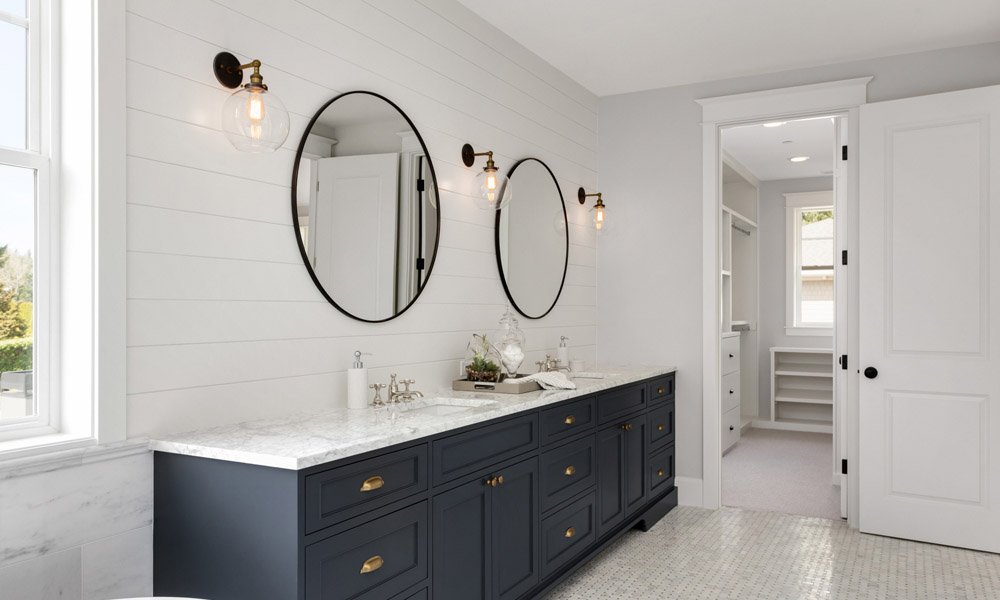
One of the main reasons shiplap has remained popular is its versatility. Whether you’re aiming for a coastal, rustic, or modern look, shiplap can fit into virtually any bathroom design. A whitewashed shiplap wall pairs beautifully with black fixtures for a chic, modern farmhouse look, while natural wood can create a warm, spa-like atmosphere.
Consider using shiplap on a feature wall behind the vanity or bathtub, or even extending it to the ceiling for added visual interest. Shiplap can also be painted in contrasting colors to create a two-tone effect or arranged in bold geometric patterns for a contemporary twist.
Frequently Asked Questions
Can I use real wood shiplap in my bathroom?
Yes, but it requires proper sealing and maintenance to prevent moisture damage.
What’s the best type of shiplap for bathrooms?
Moisture-resistant MDF or PVC are ideal for bathrooms due to their durability and water resistance.
How do I maintain shiplap in a bathroom?
Regular cleaning, checking for damage, and reapplying sealant as needed will help maintain its appearance.
Can shiplap be installed on bathroom ceilings?
Yes, shiplap works beautifully on ceilings and adds texture and style to the space.