Do you want to give your ceiling a fresh and unique look? Metal tiles can make any room stand out with style and durability. They come in different designs, colors, and finishes to match your taste. Installing them can seem tricky, but with the right tips, it becomes easy.
Choosing the right tiles is key to creating the look you want. You can mix patterns or keep it simple for a modern feel. Start your ceiling transformation today and see how metal tiles can change your space.
Select Tile Design
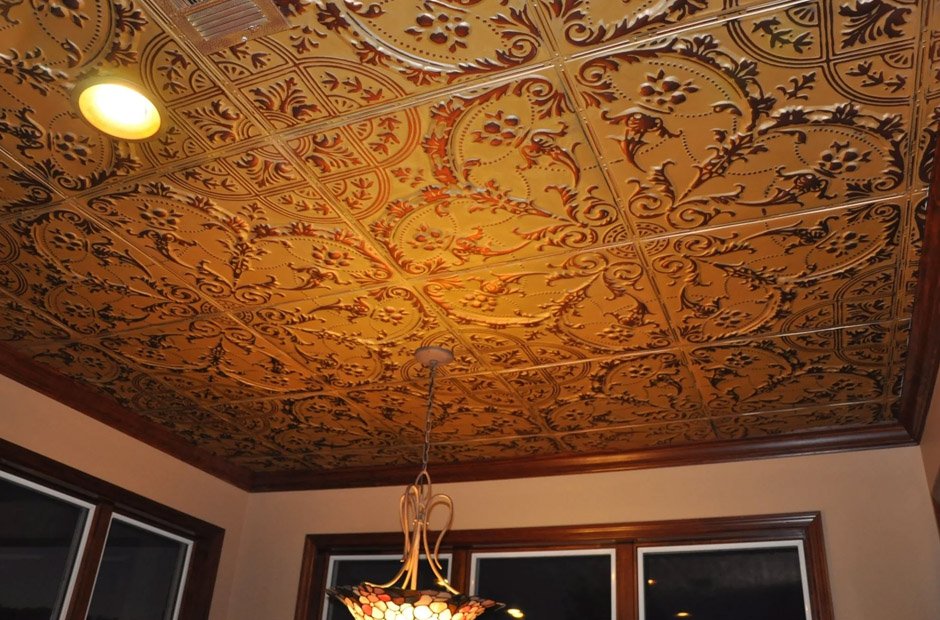
The design of your metal tiles sets the tone for the room. You can choose simple patterns for a modern look. Ornate designs create a classic or vintage feel. Consider the size of the tiles and how they fit the space. Colors can match your walls, furniture, or décor.
Reflective finishes make the room feel brighter and larger. Matte finishes give a subtle and elegant effect. Mixing different designs can create a unique pattern. Think about how the ceiling will look from different angles.
Choose a design that matches your personal style. A well-selected design makes your ceiling a standout feature in the room.
Choose Material Type
Metal tiles come in different materials, each with its own look and feel. Aluminum tiles are lightweight and easy to install. Copper tiles give a warm, classic appearance. Steel tiles are strong and durable for long-lasting use. Some materials are painted or coated for extra protection.
Consider the weight of the material for your ceiling structure. Reflective metals can brighten a room naturally. Matte metals offer a soft, elegant finish. Your choice affects the style and durability of the ceiling.
Think about how the material fits your budget and design goals. Choosing the right metal makes your ceiling both beautiful and practical.
Measure Your Space
Accurate measurements are important before installing metal tiles. Measure the length and width of your ceiling carefully. Use a tape measure for precise numbers. Check for any irregular areas or obstacles like beams or lights. Write down all the measurements to avoid mistakes.
Divide the ceiling into sections to plan the layout. Consider the size of your tiles when measuring. Account for extra space for edges and trim. Double-check your numbers before cutting tiles.
Proper measurements help reduce waste and save money. Measuring well ensures your ceiling looks neat and professional.
Plan Tile Layout
Planning the layout helps your ceiling look balanced and professional. Start from the center of the ceiling for a symmetrical design. Dry-fit a few tiles to see how they will align. Decide if you want a simple grid or a patterned arrangement. Make adjustments for lights, vents, or other obstacles.
Mark guidelines on the ceiling to keep tiles straight. Consider spacing between tiles for a clean look. Mix different tile designs carefully if you want a unique pattern.
Check how the edges will look near walls. Proper planning prevents gaps or uneven placement. A good layout makes installation faster and easier.
Prepare Ceiling Surface
A smooth and clean ceiling surface is essential for metal tiles to stick properly. Start by removing any dust, dirt, or old paint. Scrape off peeling areas to make the surface even. Fill cracks, holes, or dents with spackle or filler. Let the filler dry completely before sanding.
Sand the entire ceiling to create a flat and smooth surface. Check for loose plaster or weak spots and repair them. Remove light fixtures or ceiling decorations that may get in the way. Wipe the surface with a damp cloth to remove dust after sanding. Apply a primer if the tiles need extra adhesion.
Mark straight guidelines to help place tiles accurately. Preparing the ceiling carefully ensures a clean, durable, and professional-looking finish.
Gather Needed Tools
Having the right tools makes installing metal tiles much easier. You will need a tape measure to get accurate dimensions. A pencil or chalk is useful for marking guidelines on the ceiling. A level helps keep tiles straight and even. Tin snips or a utility knife are needed to cut tiles to size.
A ladder or step stool lets you reach high areas safely. Adhesive or nails are required to secure the tiles in place. A caulking gun is useful if you use adhesive tubes. Gloves protect your hands while handling sharp metal edges. Safety glasses keep your eyes safe from dust or sharp fragments.
A straightedge or ruler helps make precise cuts. Having all tools ready before starting saves time and ensures a smooth installation process.
Cut Tiles Properly
Cutting metal tiles carefully ensures a neat and professional look. Measure the area where the tile will go before cutting. Mark the cutting line clearly with a pencil or marker. Use tin snips or a utility knife for straight cuts. Take your time to follow the line precisely. Wear gloves to protect your hands from sharp edges.
Safety glasses keep your eyes safe from metal fragments. Check the fit by placing the tile in its spot before final installation. Trim small sections slowly to avoid mistakes. Smooth rough edges with sandpaper or a file.
Cutting tiles properly reduces gaps and uneven edges. Accurate cuts make your ceiling look polished and well-finished.
Install Tiles Carefully
Start by preparing the adhesive or nails for your tin ceiling tiles. Place the first tile at the center or starting point of your layout. Press the tile firmly against the ceiling to secure it. Check that the tile is level before moving to the next one. Continue installing tiles row by row for a neat and even pattern. Leave a small gap if needed for trim or expansion.
Adjust tiles as you go to keep lines straight. Use a level often to ensure all tiles stay even. Handle each tin ceiling tile carefully to avoid bending or scratching. Take breaks if needed to maintain accuracy.
Make sure all tiles are firmly attached before finishing. Installing tin ceiling tiles carefully gives your ceiling a polished and professional look.
Learn More About Metal Tiles for a Unique Ceiling
Metal tiles can transform any ceiling into a stylish feature. They come in many designs, colors, and materials to match your space.
Proper planning and careful installation make a big difference. Maintaining the ceiling keeps it looking beautiful for years. Using metal tiles is an easy way to add a unique and lasting touch to your room.
Visit our blog for more!